1. Installation & Getting Started
This preliminary section contains installation instruction and some initial exercises to help you get started with programming in Python.
1.1. Installation
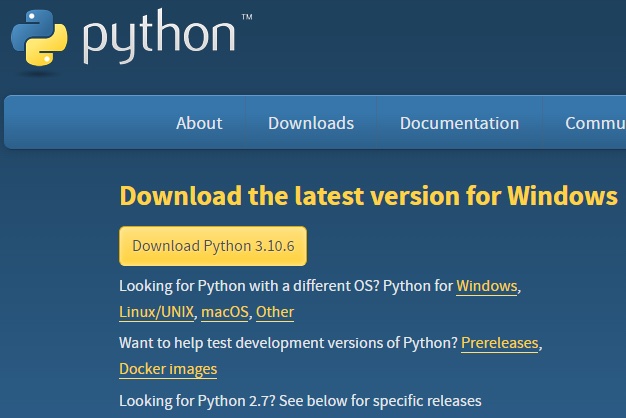
You can get a basic Python installation for Windows, Mac or Linux through this site: http://www.python.org/downloads. This is enough to get you started.
Click ‘Download the latest version for Windows’ (or ‘Mac’ or ‘Linux’). Run the downloaded installer. When installing just choose all the default settings.
1.2. Your First Python Programs
Interactive Mode
An easy way to write and run simple Python Programs is through the Interactive DeveLopment Environment (IDLE). IDLE was specifically built to learn programming with Python. To start IDLE:
Windows: press the Windows button and type ‘idle’.
Mac/OSX: via Launchpad, type ‘idle’
Once started you should see a console (text-only window) similar to this:
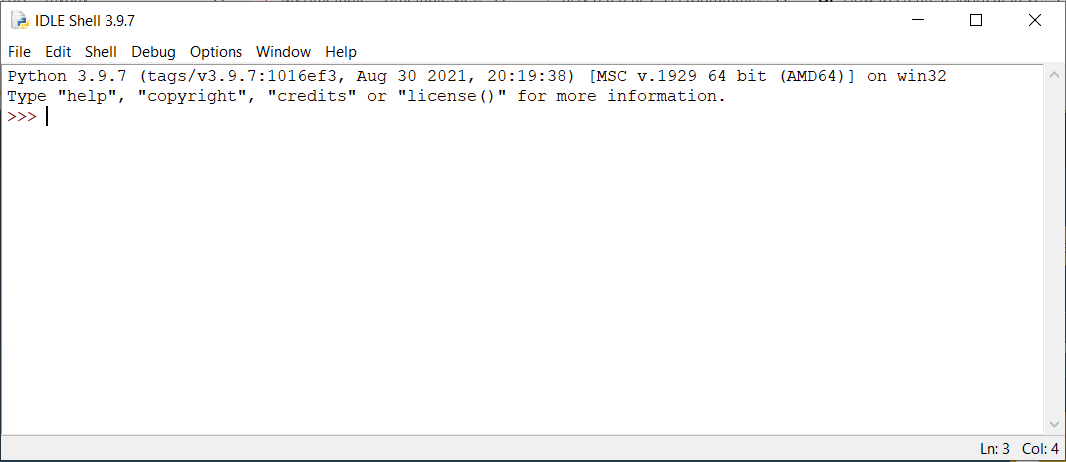
The symbol ‘>>>’ is the so-called Python statement prompt, and it is where you can enter a Python statement. Type in the following line and press the ‘enter’ key.
print("Welcome to Psychology and Technology")
The string “Welcome to Psychology and Technology” appears on the console. The Python interpreter has executed the statement you just typed. The print function is the command to display text messages to the console.
This way of writing and executing statements is called interactive mode. It allows the programmer to experiment with Python statements in an easy manner and see the results immediately.
Script Mode
The interactive mode has one significant drawback: all statements will be lost after closing IDLE. Therefore, another mode - script mode - is normally used in which statements are stored in a file with the .py extension. Let’s try to make our first Python Program that can be run multiple times.
Restart IDLE and select ‘New file’ from the ‘File’ menu. An additional window will appear. Type the following lines:
# Display two messages
print("Welcome to Psychology and Technology")
print("Python is easy")
As you will have noticed by now, the statements that you type will not be executed immediately, but they can be saved for later re-use. Save the file (menu option under ‘File’). It will have the extension .py and is commonly called source file by programmers. Run the statements by choosing menu option ‘Run Module’ under menu item ‘Run’. You should see something like this:
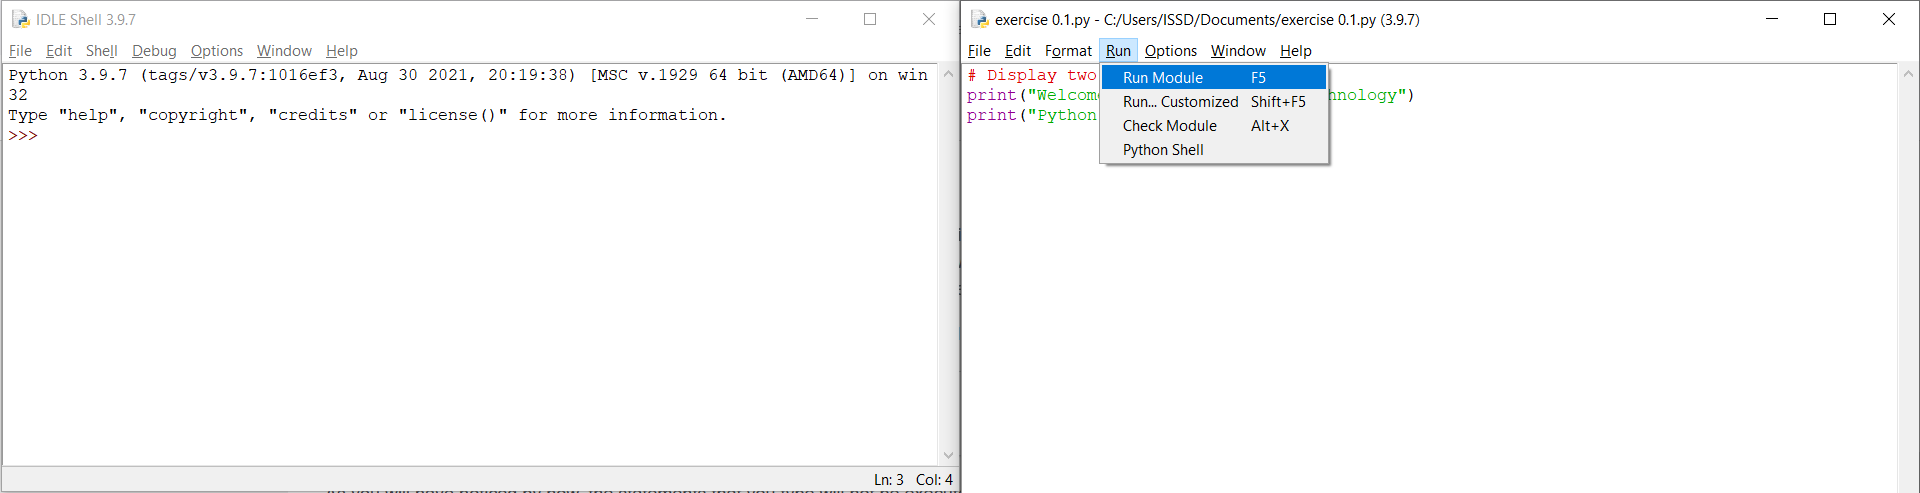
When you click on ‘Run Module’ the statements are executed and the output is displayed in the interactive window:

You can re-open and re-run the source file with IDLE after restarting as many times as you like.
Some final remarks.
The ‘Run Module’ option is only visible if the cursor is in the source file.
Note that IDLE uses colors in the source file for readability, the colors have no other meaning.
Any text on the right of the # character will not be interpreted by Python. You can use it for comments in your code.
You’re all set to start programming!
1.3. Getting Started Exercises
These initial exercises are meant to get a feeling for some other possibilities in Python: programming graphics and (GUI) Windows Applications. Don’t worry if you don’t understand all of the statements at once. The main purpose is to get a feel for what is possible with Python.
Exercise 1.1 (Drawing)
Let’s have some fun and make simple drawings with Python. Start IDLE and type the following lines in interactive mode:
import turtle
and
turtle.circle(100)
You should see a black circle in a new window (it has a radius of exactly 100 pixels).
Turtle is a built-in module that contains functions for making simple drawings. Some more simple commands the turtle can do (try them out one by one in interactive mode):
turtle.penup()      # lift the "pen" from the "paper"
turtle.forward(150) # move 150 forward in a straight line
turtle.pendown()    # put the "pen" down on the "paper"
turtle.right(45)    # turn the turtle 45 degrees to the right
turtle.right(45)    # turn the turtle 45 degrees to the right
turtle.back(150)    # move 150 backward in a straight line
turtle.circle(100, extent = 90)  # draw part of a circle, only 90 degrees
There are many more things the turtle can do for you. If you are curious, you can find out here https://docs.python.org/3/library/turtle.html.
Let’s try some more. Use New to get a new script window and type in the following script:
import turtle

turtle.pensize(3)

turtle.penup()
turtle.goto(-110, -25)
turtle.pendown()
turtle.color("blue")
turtle.circle(45)

turtle.penup()
turtle.goto(0, -25)
turtle.pendown()
turtle.color("black")
turtle.circle(45)

turtle.penup()
turtle.goto(110, -25)
turtle.pendown()
turtle.color("red")
turtle.circle(45)

turtle.penup()
turtle.goto(-55, -75)
turtle.pendown()
turtle.color("yellow")
turtle.circle(45)

turtle.penup()
turtle.goto(55, -75)
turtle.pendown()
turtle.color("green")
turtle.circle(45)
Save (choose your own file name, just not turtle.py) and Run it.
Now, try to answer the following questions:
Can you explain what you see?
Why are the ring colors different? Can you explain the order in which they have been drawn?
Why are the rings thicker than in the interactive example above?
Exercise 1.2 (Reaction Time Tester)
We will also explore so-called windows programming with one example. Restart IDLE and type in interactive mode:
>>> from tkinter import *
>>> myWindow = Tk()                     # a window appears
>>> myWindow.title("My First Window")   # the title of the window changes to "My First Window"
The window that appears may be behind your IDLE window. Tkinter is a so-called module that gives programmers the possibility to work with Graphical User Interfaces (GUI) in an easy way. More on tkinter later in this course (https://docs.python.org/3/library/tkinter.html).
Start a new script and type in the following program:
from tkinter import *
from tkinter.font import nametofont
import time


class ReactionTimer():
    def __init__(self, root):
        window = root
        window.geometry("450x250")
        window.title("Python Reaction Timer")

        nametofont("TkDefaultFont").configure(size=24)
        nametofont("TkCaptionFont").configure(size=24)
        nametofont("TkTextFont").configure(size=24)

        self.button = Button(window)
        self.button["text"] = "Start Reaction Test"
        self.button["command"] = self.handleStartClick
        self.button.pack()

        self.label = Label(window)
        self.label.pack()

    def handleStartClick(self):
        time.sleep(1)
        self.button["text"] = "React Now!"
        self.button["command"] = self.handleStopClick
        self.startTime = time.time()

    def handleStopClick(self):
        self.stopTime = time.time()
        self.reactionTime = self.stopTime - self.startTime
        textMessage = str(round(self.reactionTime, 2)) + " seconds!"
        self.label["text"] = "Your reaction time was " + textMessage


def main():
    root = Tk()
    myWindow = ReactionTimer(root)
    root.mainloop()


main()
Save and Run it. When you press the Start button it will wait for a second and then change the text to Stop. Press the Stop button as quickly as you can! Try to answer the following questions:
What is your reaction time?
Do you recognize texts from the source code in the script in the window?
What line determines the text on the button? (You can find the script line at the bottom of the script window when your cursor is on the line (e.g. Ln: 22)
Can you explain the size of the window? Can you change it?
1.4. Assignment 0
Use your imagination to make a nice drawing with turtle (from exercise 1.1) or alternatively, write your own name.
Assignment 0 can be submitted in Ans (for instructions, please refer to Assignment 0 in the Canvas course). If you are enrolled in the 0HV120 course you should see the 0HV120 assignments. This assignment is just for practising handing-in assignments and will not be graded.
© Copyright 2022, dr. P. Lambooij
last updated: 04-09-2022